Tutorial 4 — Pump Calibration
This tutorial explains how peristaltic pumps work, how to calibrate them so the AgXRP knows how much water each pump delivers, and how to get water flowing for the first time.
Before You Begin
Make sure you have completed Tutorial 1 — Kit Contents, Assembly & Wiring and Tutorial 2 — Dashboard & Configuration, and that the AgXRP web interface is accessible on your device.
What You'll Need
| Component | Quantity | Notes |
|---|---|---|
| Water bottle | 1 per pump | Any bottle that fits in the 3D-printed holder |
| Silicone tubing | 1 per pump | Included with the pump kit |
| Catch container | 1 | Cup or bowl to catch water during calibration |
| 3D-printed Velcro bottle holder | 1 per pump | Included with the AgXRP kit |
How Peristaltic Pumps Work
The AgXRP uses peristaltic pumps to deliver water to each plant. A peristaltic pump moves liquid by squeezing a flexible tube in a rotating, wave-like motion — similar to how your throat muscles move food when you swallow. A set of rollers inside the pump presses against the outside of the silicone tube, and as the motor spins, each roller compresses a small section of the tube and pushes it forward. Because the tube is always squeezed at multiple points, liquid cannot flow backward — it can only move in the direction the motor is spinning.
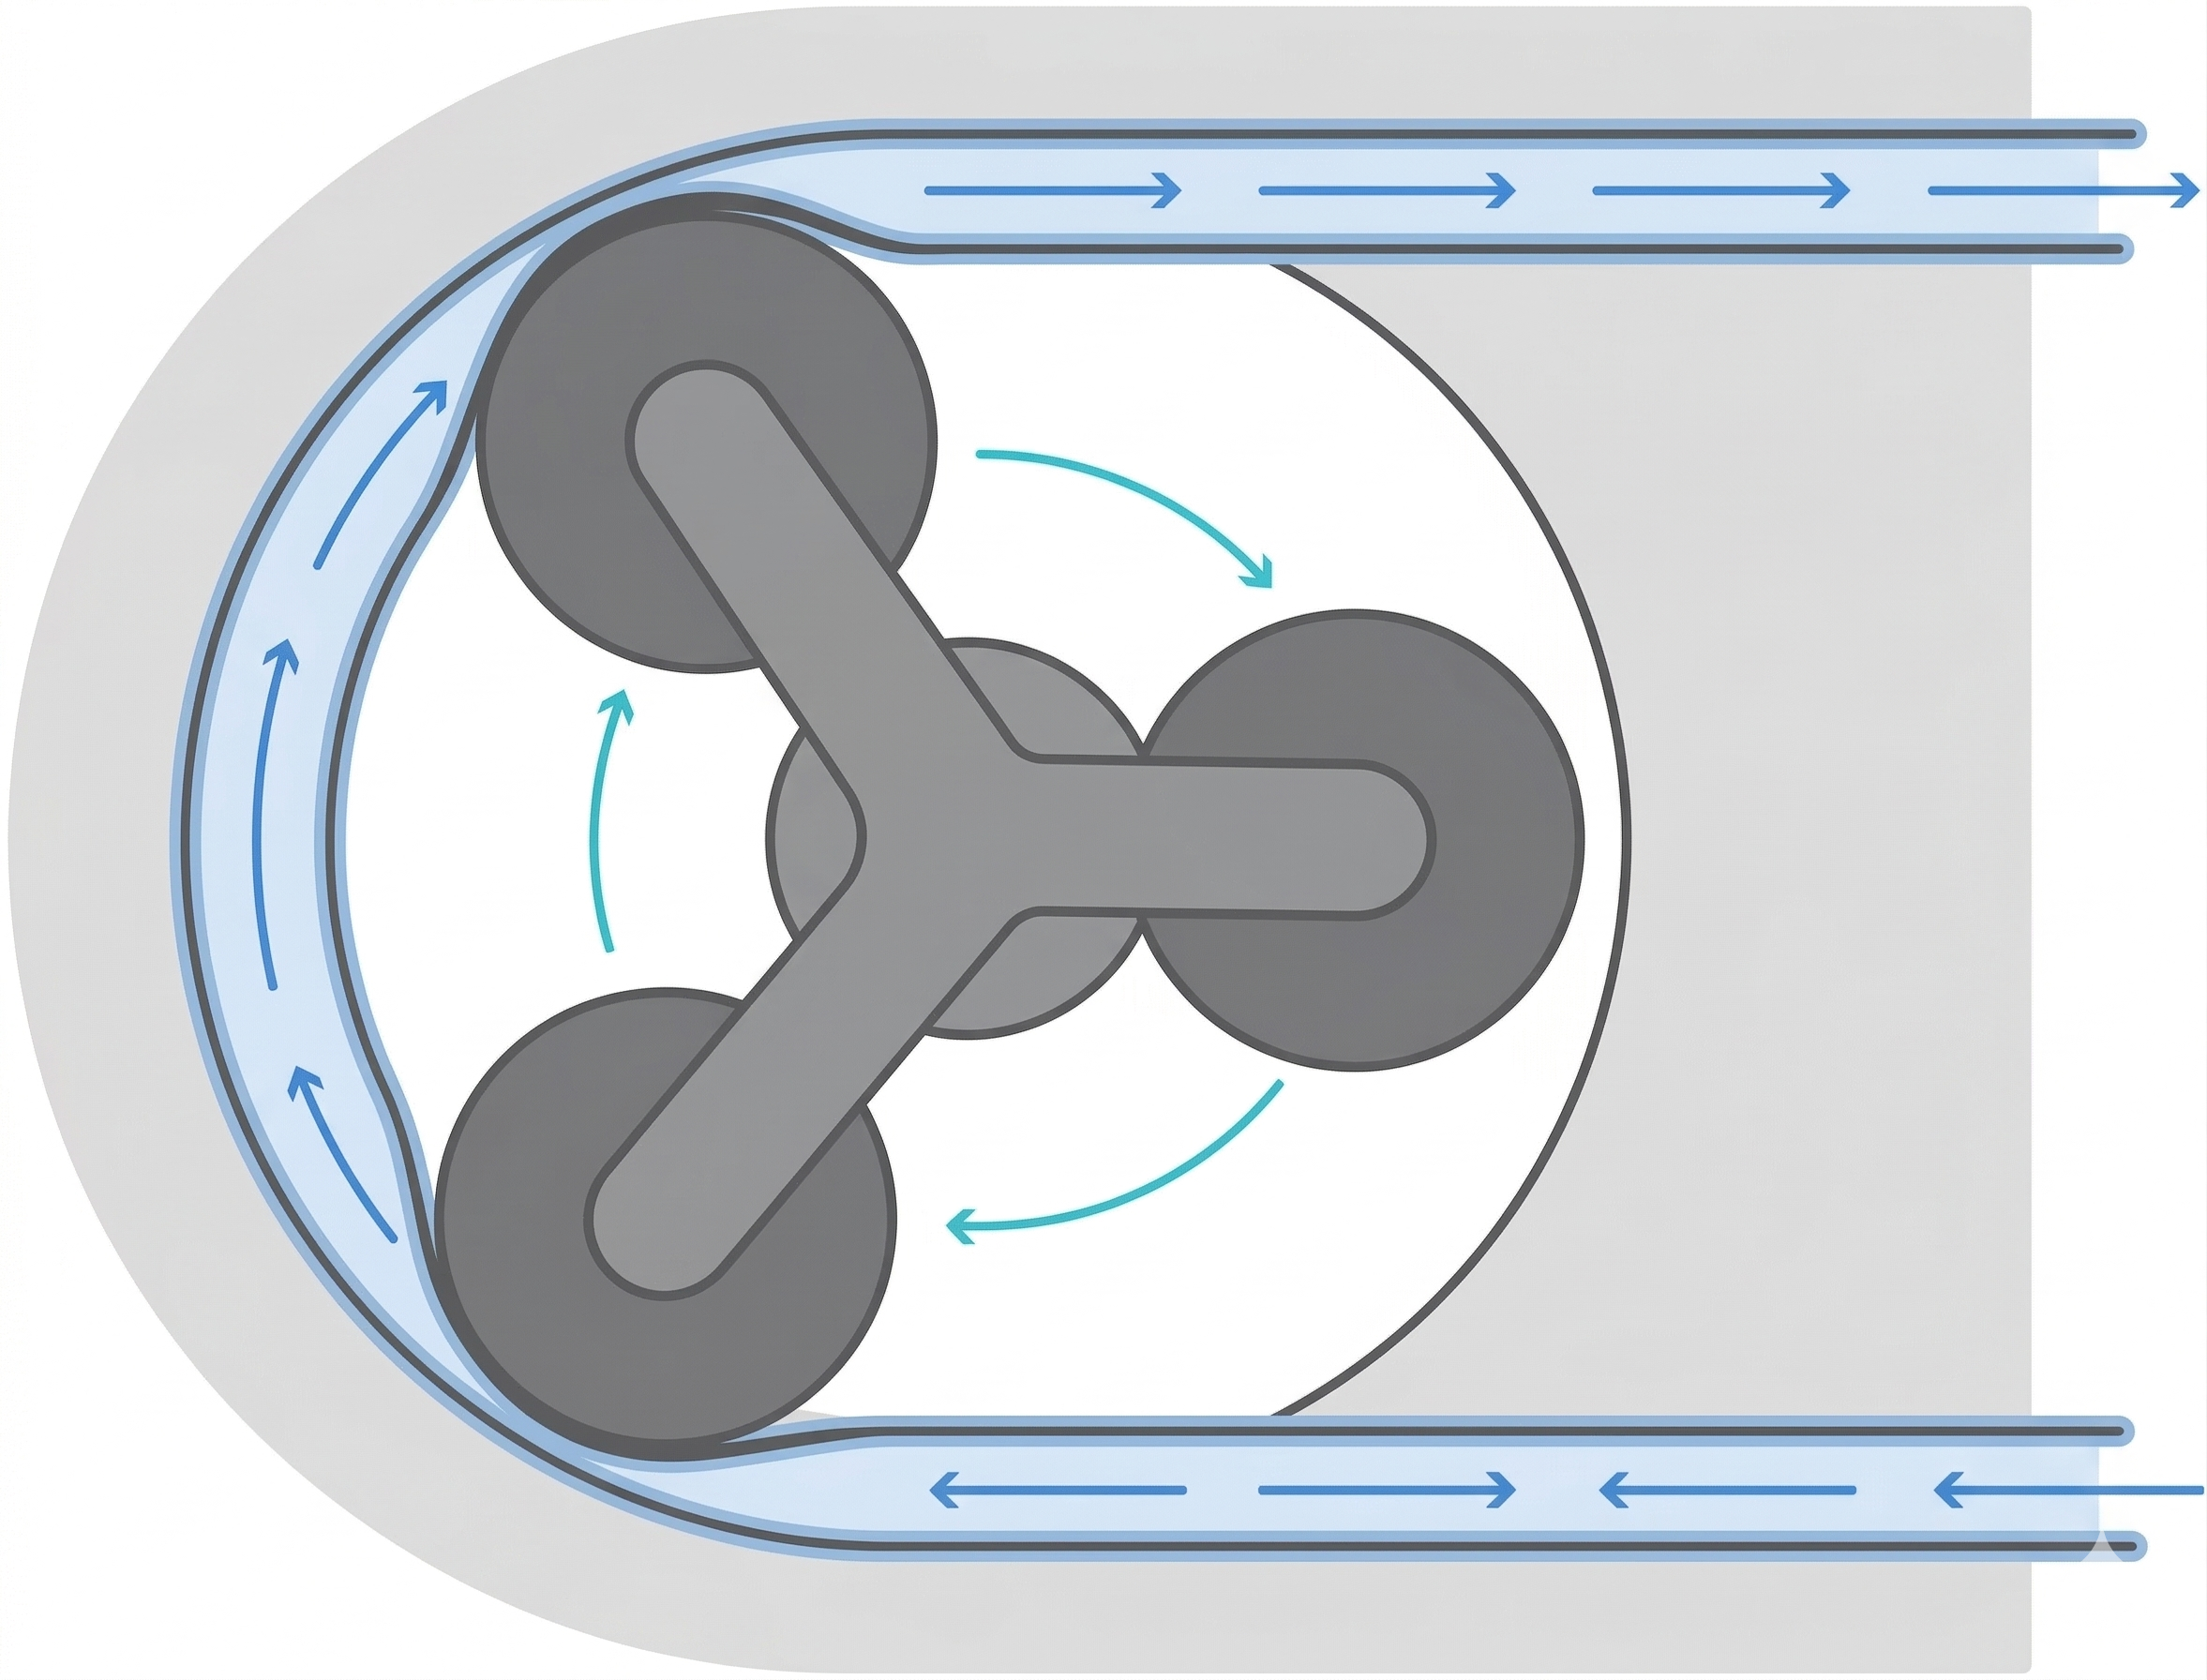
This design has two big advantages for the AgXRP. First, the liquid only ever contacts the inside of the silicone tube — the pump mechanism itself stays dry and clean. Second, the flow rate is very consistent and predictable: for a given motor speed, the pump delivers almost exactly the same volume of water every time it runs.
Calibration: Measuring Flow Over Time
Because peristaltic pumps are so consistent, we can calibrate them by timing them. The goal of calibration is to answer the question: how long does this pump need to run in order to deliver a specific volume of water? For example, you might find that running the pump for 3 seconds at 50% speed moves approximately 10 ml of water.
Once that relationship is established, the AgXRP can calculate how long to run each pump in order to hit a target watering volume. Every pump is slightly different — tubing length, tubing diameter, and motor-to-motor variation all affect flow rate — so it's important to calibrate each pump individually rather than assuming they all behave the same way.
Priming the Pump
Before a pump can move water, the air in the silicone tube needs to be displaced. It can take a little effort to get water flowing for the first time, so don't be discouraged if the pump runs briefly without water coming through. Once water starts moving, the pump should draw it up from the bottle smoothly and consistently on every subsequent run.
Steps
Step 1. Fill a bottle with water and set it aside.
Step 2. Insert the tube into the AgXRP pump housing.
- Gently lift the gears slightly to create clearance.
- Press the tube around the inside edge of the pump housing, seating it fully into place.
- Make sure the tube extends an even length on both sides of the pump.
 Inserting the tube into the AgXRP pump housing
Step 3. Place one end of the tube into the water bottle. Place the other end into a separate container to catch runoff during calibration.
Tube positioned with one end in the water bottle and the other in a catch container
Step 4. In the AgXRP web interface, set the Pump Effort to 0.5 (50% speed is a good starting point for calibration) and click Start Pump.
- If water flows in the wrong direction, set the Pump Effort to a negative value (e.g.,
-0.5) and click Start Pump again.
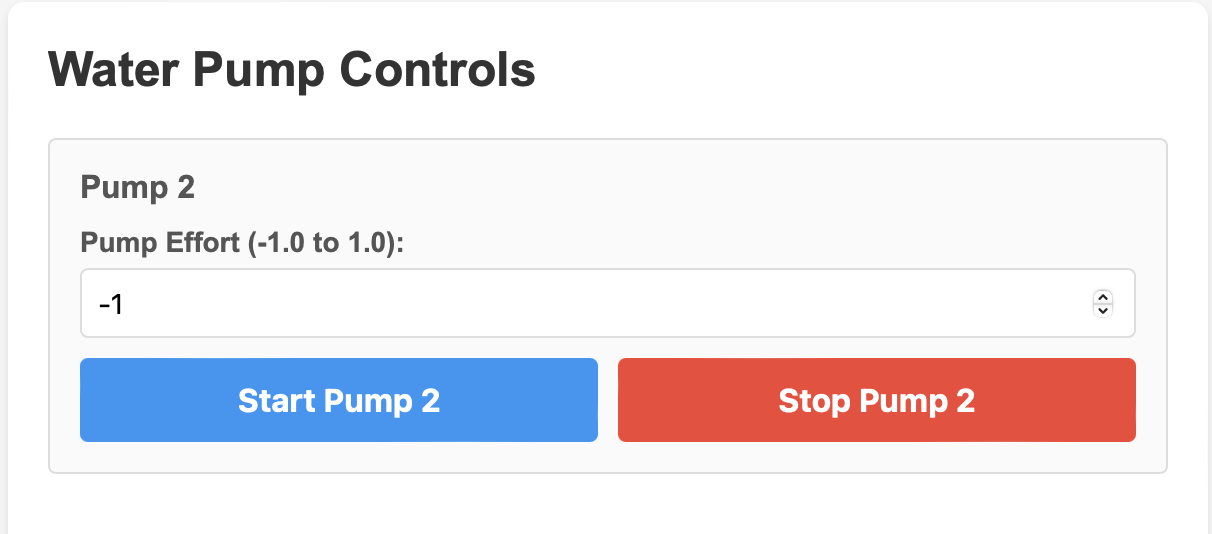 Setting Water Pump Controls on web interface
Step 5. Confirm that water is flowing steadily through the tube and into the catch container.
- Allow the pump to run for 10–15 seconds to verify consistent flow.
- If the pump struggles to draw water up, tilt the water bottle so water flows more easily toward the tube inlet.
- Once confirmed, click Stop Pump.
Water flowing through the pump tube during calibration
Step 6. Once water flows consistently, secure the water bottle in the 3D-printed Velcro holder.
Step 7. If you have additional pumps, repeat all steps above for each pump.
Full water pump system set-up (bottle in the 3D-printed Velcro holder)
Verifying It Works
A correctly functioning pump will pull water steadily up from the bottle and deliver it in a smooth, continuous stream into the catch container. There should be no prolonged air gaps in the tube once flow is established. If you set Pump Effort to a positive value, water should travel from the bottle toward the catch container — not the other way around.
Troubleshooting
| Symptom | Likely Cause | Fix |
|---|---|---|
| Pump runs but no water flows | Air in the tube; pump not yet primed | Let the pump continue running — it may take several seconds to pull water up. Tilt the bottle toward the tube inlet to help. |
| Water flows in the wrong direction | Pump effort sign is incorrect | Set Pump Effort to a negative value (e.g., -0.5) and try again. |
| Water leaks outside the tube | Tube not seated properly in the pump housing | Stop the pump, remove the tube, and re-seat it so it is evenly positioned around the inside of the pump housing. |
| Flow is intermittent or weak | Tube pinched or bottle too far from the pump | Check that the tube is not kinked or compressed anywhere along its length. Lower the bottle to reduce the height the pump must lift water. |
Next Steps
- Proceed to Tutorial 5 — Moisture Sensor Calibration to calibrate your moisture sensors for your specific soil and pots.
- You will need dry soil for the next tutorial — see Appendix i if you need to dry your soil first.