Tutorial 5 — Moisture Sensor Calibration
This calibration procedure determines the correct Soil Moisture Threshold for your specific plant and pot. The threshold tells the automatic watering system when the soil is too dry and needs water. Complete this once before starting any plant experiment.
Before You Begin
Make sure your potting soil is completely dry before starting. See Appendix i for instructions on drying soil. You should also have the AgXRP web interface running and accessible (see Tutorial 2).
What You'll Need
| Component | Quantity | Notes |
|---|---|---|
| Gardening pot | 1 | Know its volume in cubic inches or milliliters |
| Dry potting soil | Enough to fill the pot | See Appendix i |
| Measuring cup or graduated cylinder | 1 | For measuring water |
| Moisture sensor (connected to AgXRP) | 1 | Already set up in Tutorial 1 |
How Capacitive Soil Sensors Work
The AgXRP uses a capacitive soil moisture sensor to measure how much water is in the soil. Unlike older resistive sensors that pass a small electrical current through the soil (which causes the metal probes to corrode over time), a capacitive sensor measures the electrical capacitance of the soil around it — no current flows through the soil itself.
The principle relies on the fact that water has a much higher dielectric permittivity than dry soil particles or air. In simple terms, water is much better at storing an electric field than air is. The sensor creates an electric field around its probes, and the strength of that field depends on how much water is present in the surrounding soil. The more water there is, the higher the capacitance, and the higher the value reported by the sensor.
The AgXRP dashboard reports this value in pF (picofarads). As a rule of thumb:
- Higher pF value = more water in the soil = wetter
- Lower pF value = less water in the soil = drier
This means the automatic watering system triggers when the sensor reading drops below the threshold you set — the soil has lost enough water that the reading has fallen to your target level.
Because the relationship between pF readings and actual soil moisture depends on the specific soil mix, pot size, and sensor placement, each setup needs to be calibrated individually. That is what this tutorial covers.
Steps
Step 1. Fill a gardening pot to the top with dry potting soil. Note the pot's volume before adding soil — this is usually printed on the pot or can be found from the manufacturer.
Step 2. Insert the moisture sensor into the dry soil, pushing it in until the sensing area is fully submerged. Record the moisture reading shown on the AgXRP Dashboard — this is your dry baseline reading. Then remove the sensor.
Step 3. Calculate 10% of the pot's volume in milliliters and measure out that amount of water. Ten percent represents a well-watered but not waterlogged starting point — enough to give the sensor a meaningful "wet" reading to use as your threshold, without saturating the soil to the point where it would mask normal variation.
Unit Conversion
1 cubic inch (in³) = 16.4 mL
Example: A 100 in³ pot holds 1,640 mL total — add 164 mL of water (10%).
Step 4. Pour the water evenly across the top of the soil. Wait 30–60 minutes for it to absorb fully throughout the pot.
Step 5. Insert the moisture sensor back into the soil (at approximately the same depth as before) and record the new moisture reading. This value is your Soil Moisture Threshold — the level below which the system should trigger watering.
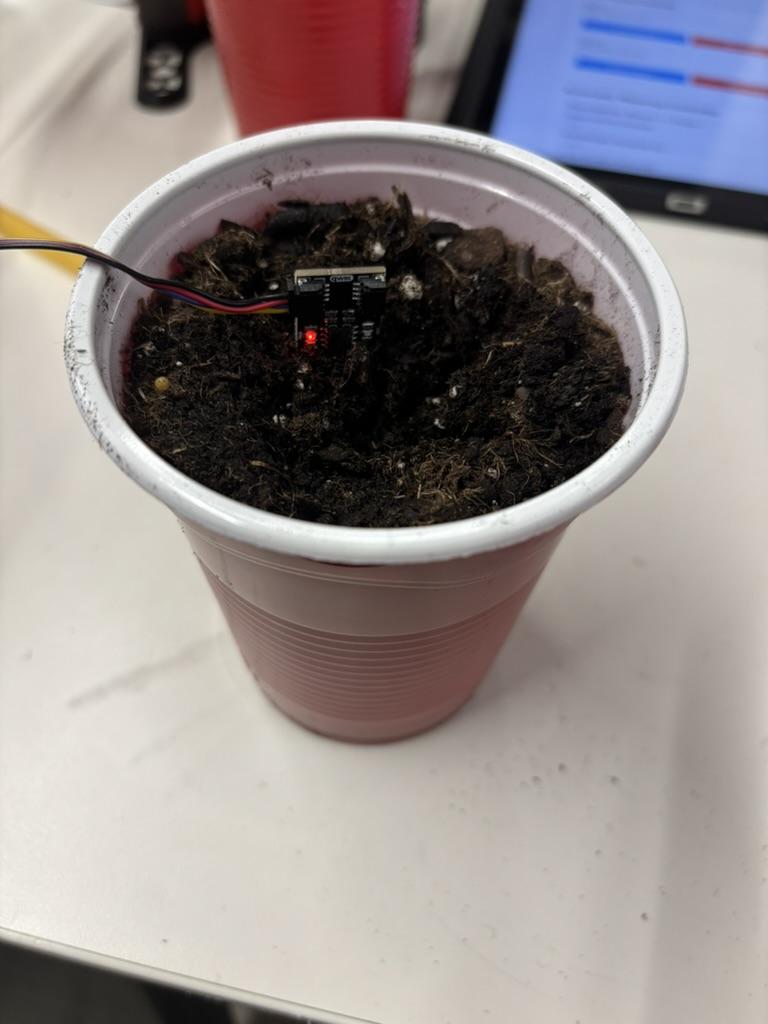 Moisture sensor inserted into calibrated soil
Step 6. In the web interface, go to the Automatic Watering Controller section on the Dashboard. Enter the value you just recorded in the Soil Moisture Threshold field and click Update Settings.
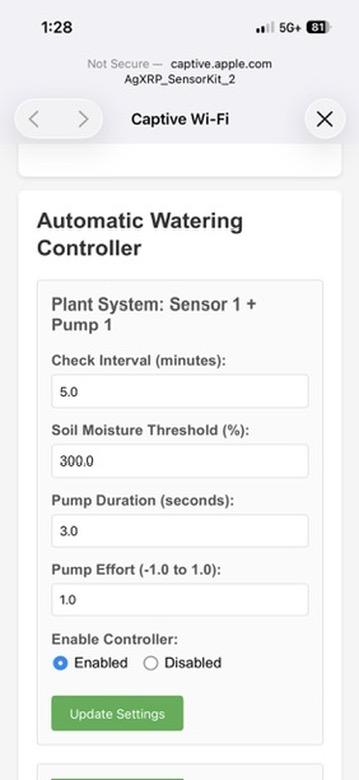 Updating the Soil Moisture Threshold in the web interface
Step 7. Allow the system to run and verify the results.
- Monitor the sensor readings to confirm the automation is triggering correctly.
- After the pump runs for the first time, wait an additional 15–30 minutes and check the moisture reading again.
- If the reading is significantly above or below your target, adjust the settings as needed:
- Check Interval — change how often the sensor checks moisture.
- Pump Duration — increase to deliver more water per cycle, decrease to deliver less.
- Pump Effort — adjust motor speed for more or less water flow per second.
Calibration complete!
Your moisture sensor is now calibrated for your specific soil and pot.
Next Steps
- Proceed to Tutorial 6 — Plant Experiment to plant your seeds and begin your experiment.